


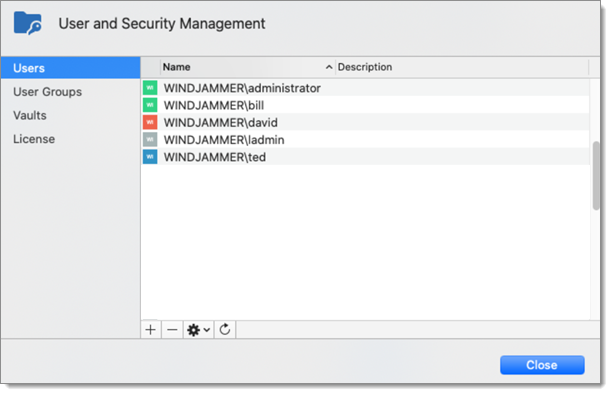
User Management is available from Administration – Users and allows you to create, manage, and assign rights to a user.

Remote Desktop Manager macOS allows for advanced user right management allowing you to control how a session is employed by each user. Note that some visibility control will depend on the active data source. There is currently no way to inherit security rights from a group as they must be assigned individually for each user. If using the Devolutions Server you will then be able to use Integrated Security with Active Directory.
This feature requires an Advanced Data Source.
To create users and assign rights, you must be administrator of not only Remote Desktop Manager macOS, but also of the underlying database.
Not all Advanced Data Sources support the use of Integrated Security. To learn more please see Integrated Security.
Settings
Create users
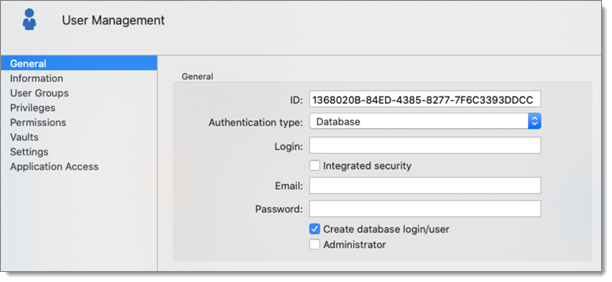
To create a new user click on the add button. You can create a user using default security (specifying the password) or Integrated Security. Consult Permissions for more information on the rights that can be added to a user. You can assign different security options to the user such as allow the user to use the Offline mode.
Not all Advanced Data Sources support the use of Integrated Security. If using the Devolutions Server you will then be able to use Integrated Security with Active Directory.To learn more please see Integrated Security.
User Management Settings
General
| OPTION | DESCRIPTION |
|---|---|
| Authentication type | Select the user's authentication type:
|
| Username | Enter the username for the user. When using Integrated Security, the user must be selected in the directory. |
| Integrated security | Specifies to use the Windows Integrated Authentication to authenticate to the data source. Applies only to SQL Server and Devolutions Server, depending on their configuration. When checked, an ellipsis button appears to allow you to browse for the user account in the directory. Consult Integrated Security for more information. |
| Password | Enter the user's password. This field is disabled when using Integrated Security. |
| User type | Select the type of user to create. Select between:
|
| User license type | Select the license type of user. Select between:
|
| User interface profile | Select the user interface profile of the user. Select between:
|
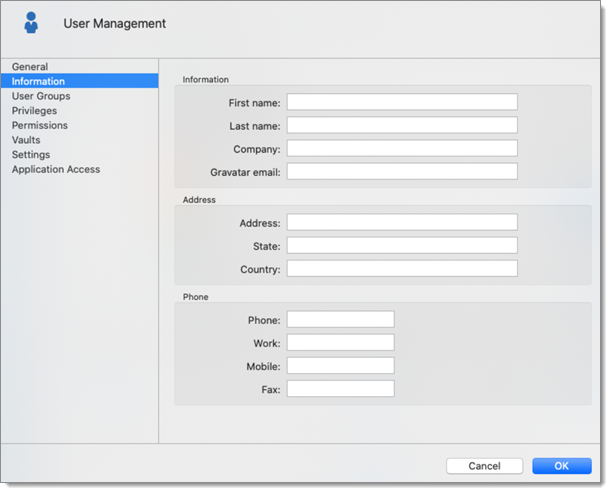
| First name | Enter the first name of the user. |
| Last name | Enter the lat name of the user. |
| Insert the user's email address. |
Information
Enter all the information needed regarding your new user.
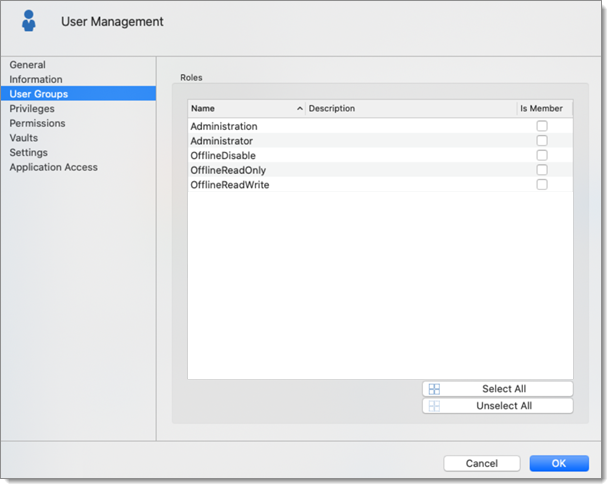
User groups
| OPTION | DESCRIPTION |
|---|---|
| User Groups | When a user group needs to be added to a user, a description column will help you to select the proper user group. |
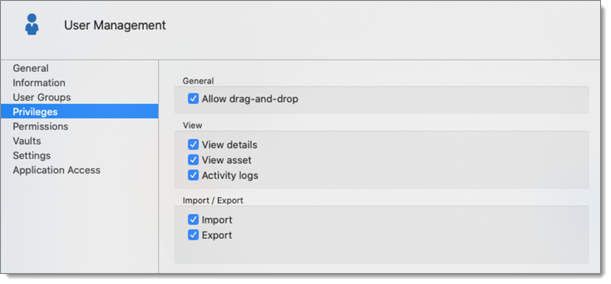
Privileges
| OPTION | DESCRIPTION |
|---|---|
| Allow reveal password | Allows the user to use the Reveal Password command. |
| Allow drag-and-drop | Allows the user to move the sessions using drag-and-drop from other applications. |
| View details | Allows the user to see the content of the Details tab for all sessions. |
| View information | Allows the user to see the content of the Information tab for all sessions. |
| View shared logs | Allows the user to see the content of the Logs that applies to a session. |
| Import | Allows the user to Import sessions (Clipboard – Paste as well). The import menu (File – Import) and the import feature in the context menu will be grayed out if the option is not active. |
| Export | Allows the user to Export sessions (Clipboard – Copy as well). The export menu (File – Export) and the export feature in the context menu will be grayed out if the option is not active. |
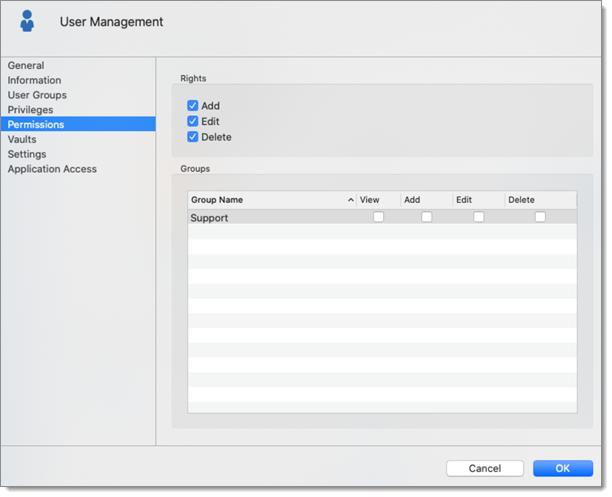
Permissions
The Permissions section allows you to assign permissions. Controls are sometimes hidden depending on the data source or the state of other controls.
Consult Permissions for more information on rights that can be added to a user.
Settings
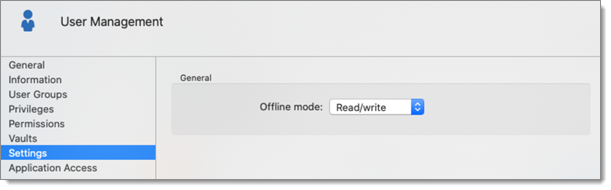
Allow the user to enable the Offline Mode on the data sources. This also depends on the data source being configured to allow it. You can choose between:
| OPTION | DESCRIPTION |
|---|---|
| Disabled | No offline cache allowed for that user. |
| Read-only | A read-only cache is allowed for Advanced Data Sources. |
| Read/Write | An advanced cache, with change synchronization, is allowed for Advanced Data Sources. |